
Mandala Madness is such a wonderful pattern created by Helen Shrimpton. Go to Google images to see the multitude of fabulous mandalas that have been created using Helen’s pattern.
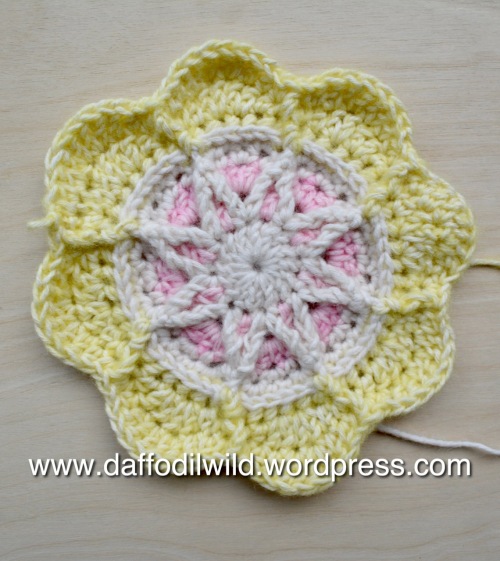
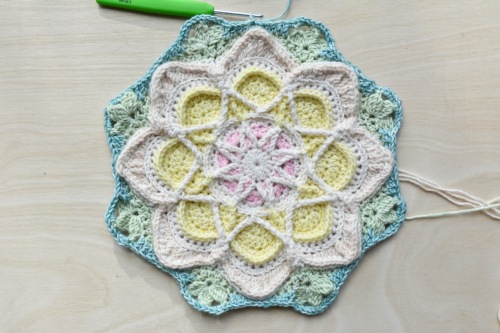
I enjoyed doing her Spiro Star pattern so much for the Nuts About Squares CAL, that I experimented with putting it at the centre of Mandala Madness – I’m really pleased with how it turned out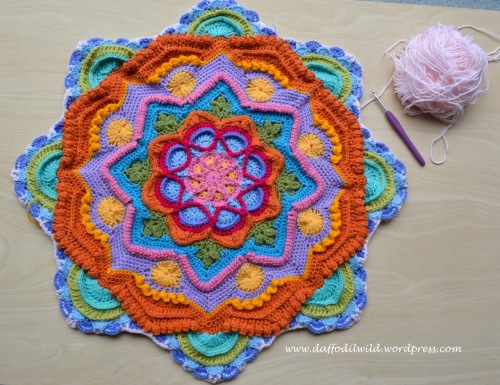
and just had to try it in another colourway.

A few people have asked me to explain how to marry the two together so here goes:
Make the Spiro Star up until Round 11
I followed the Spiro Star video tutorial by Esther from Its All In a Nutshell.
If you prefer a written pattern there is one on Helen’s site: with Photo tutorial.
About 40 years ago, I learnt to crochet from an American Book so all the crochet terms I use are US terms. And, I am left-handed, which you will probably notice in the photos. I have made a few slight variations in the way Spiro Star is worked, which I explain below, but you can simply follow the above tutorials until Round 11 if you prefer and go straight to Joining Round 1.
I am using a 3.50mm Drops Circus hook and Scheepjes Stonewashed 4ply cotton and acrylic yarn.
Round 1: Colour = Moon Stone
Starting with a Magic Ring, work a Ch3 then 15 DC giving you 16 sts.
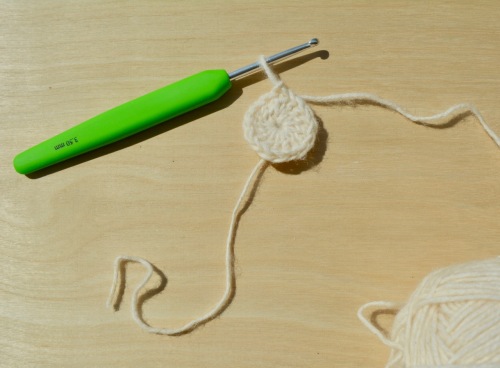
The pattern suggests you cut the yarn at this stage, but I try to minimise sewing in as much as possible, so after closing the circle with a slip st in the first Ch3, I open up the loop and pull the whole ball of yarn through and pull tight,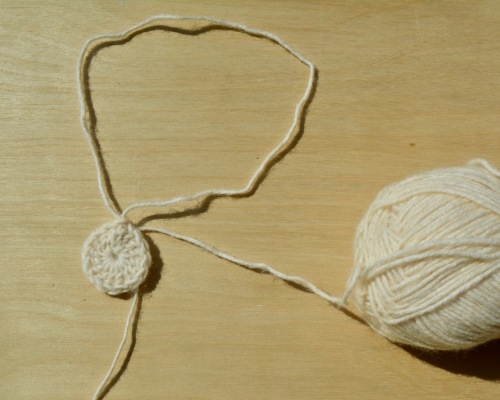 leaving the thread at the back whilst I work the next round.

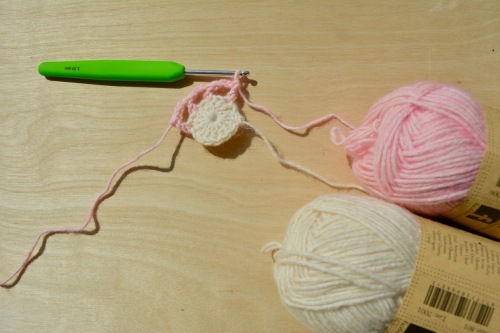
Round 2: Colour = Rose Quartz
Worked as the above tutorials suggest.
Round 3: Colour = Rose Quartz
At the end of the round this is how it looks front and back.


I mark which stitch I’m aiming for to start the next round and working on the back
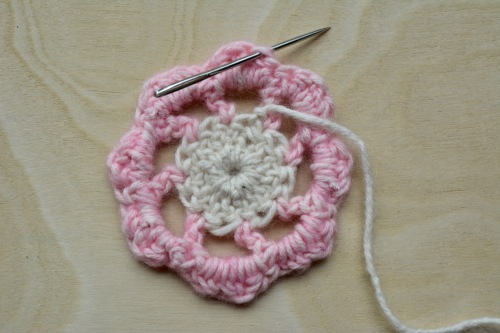


slip st. up to it. (click on any photo to see it larger)
Then, turn your work to work from the front.


Start the next round as instructed.
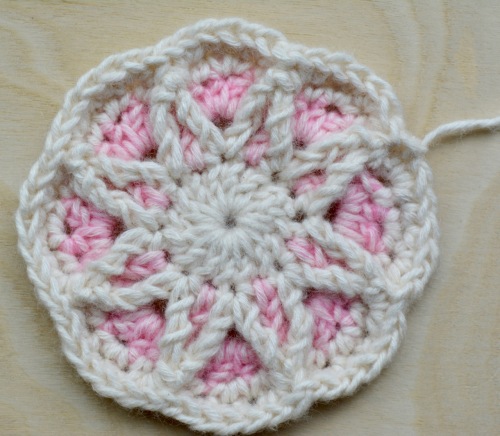
Round 4 and 5: Colour = Moon Stone
Again, I have not cut the yarn, but pulled the whole ball through the loop as before.
Front:
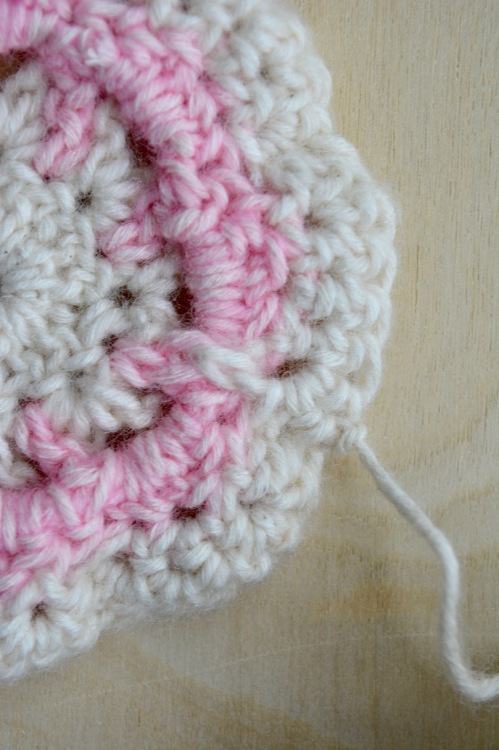
Back:

The slip stitching hardly shows on the back.
Rounds 6,7,8, 9 : Colour = Citrine
Rounds 10 and 11: Colour = Moon Stone
Slip st along the back, from Round 5, doing 2 chain sts at the end to get in the right position to start with a bphd.
(don’t cut the thread, it will be used for one of the Joining rounds)

Joining Round 1: Colour = Pink Quartzite
Working mainly in the back loops (bl).
Work a standing sc in the sc before any fpdc (which is the point of the star),
*sc the next two sts together, sc, 2 blscs in the next st, 2blhds in next st, 2bldc in next 2sts, 2bltrs into next st, bltr, 2bltrs into next st, 2bldcs into next 2sts, 2blhds into next st, 2blscs into next st, sc.*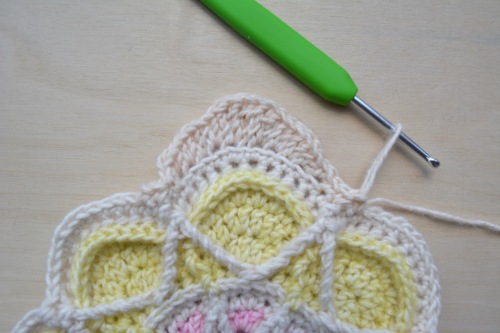
Repeat from * to * all the way round until the last repeat
at the end of this repeat, missing the final sc, slst into the standing sc to close.
Joining Round 2: Colour = Moonstone

On the back of the work, slp st with the Moon Stone yarn into position. (into the joining slst).
(If using a fresh colour, join in any sc just before the sc2tog of the previous row)
Ch1 and do a bpsc in the standing sc from the round below, missing out the star point stitch, (effectively dec 1 st at each star point) bpsc in each st until the next star point st, miss this st. Continue round the petals and join with a slst to close the round.
Joining Round 3: Colour = New Jade
Start on the 4th st back from the star point.
Standing sc,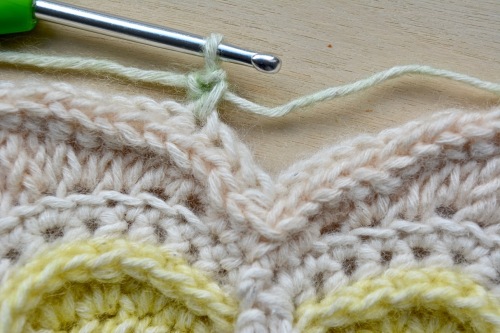
sc, miss 4 sts, sc, sc, **ch 5, bpsc round the post of the centre tr on Joining Round 1, ch5, sc in the st 4 sts back from lowest point, sc, miss4 sts, sc, sc.**
Rpt from ** to ** til the last petal, ch5, bpsc on central tr from Joining Round 1, ch5, slst in the standing sc to close the round.
Joining Round 4: Colour = New jade
As Round 17 in Mandala Madness ( which is in Part 2 video made by Esther )
Joining Round 5: Colour = New Jade
as Round 18 in Mandala Madness
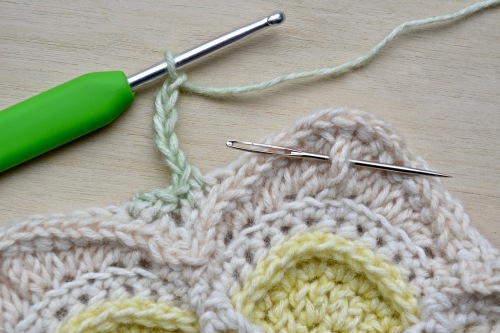
Joining Round 6: Colour = Larimar
This is very similar to Round 19 of Mandala Madness with a few little tweaks.
Start with a standing sc in the back loop of the st before the centre of the petal in Joining Round 2. (The central st has the bpsc worked in New Jade on it in Joining Round 1). 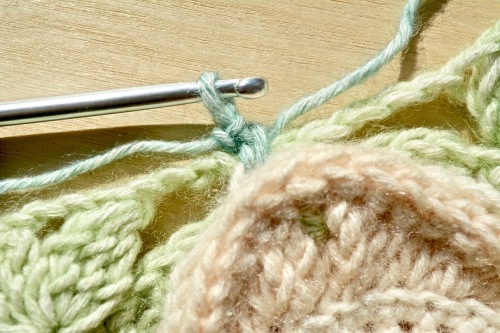 Work this together with the sc in front of the bpsc behind the petal from Joining Round 1 , miss a st at the front and work a bpsc through the next st on the petal with the 2nd sc behind in Joining Round 1.
If you watch Esther’s video tutorial, I expect/hope this will make sense.
The stitch count to find those two central stitches at the top of the petal is the only thing that is different in this Round, so I go by the position of the bpsc in New Jade (Green) rather than counting the stitches.
Feel free to contact me if you get stuck!
So! We’ve done it! We’ve joined the two patterns together! Phew! I hope it worked for you.
Now move to the instructions for Mandala Madness
You are ready to work Round 20 of Mandala Madness and continue with Helen’s pattern.
Enjoy!
Let me know how you got on. Any problems, please let me know. I am usually able to reply within 24 hours. This pattern has not been tested by anyone else so I would love to know if it works for someone else.
My heartfelt thanks go to Helen and Esther for the wonderful patterns and the amazing videos that helped me through them. A big thank you to both Helen and Esther for giving me their permission to share these instructions with you.
Go check out what else these fantastically talented and generous women have to offer – it makes my head spin to think of all the hours they give to this wonderful crochet community of ours.

 Ravelry
Pingback: Pastel Mandala Madness | Wild Daffodil
Pingback: Mandala for Little Miss M | Wild Daffodil
you are amazing! your directions are amazing! your photos are amazing! your use of the needle indication is amazing! thank you!
LikeLiked by 1 person
Wow! Donna thank you so much. I’m thrilled that you found the instructions easy to follow. Thanks so much for taking the time to comment.
I took the lead from Lucy at Attic24 who always does the MOST wonderful photo tutorials – she uses the needle to indicate the stitch to aim for – it is such a good way to do it isn’t it. Hope to see some pics of your work – are you a member of Helen’s Hookaholics on FB?
Anyway – thanks again. ❤
LikeLike
Pingback: Crochet Mandala | Wild Daffodil
Pingback: W.I.P. Wednesday | Wild Daffodil
Pingback: Crochet Mandala | Wild Daffodil
Pingback: Work in Progress | Wild Daffodil
Pingback: W.I.P Wednesday | Wild Daffodil
Pingback: Monday Mandala | Wild Daffodil
Pingback: Silent Sunday: Star | Wild Daffodil
Pingback: Fold | Wild Daffodil
I love both of these, Daffy, they are just so pretty 🙂
LikeLiked by 1 person
Thank you Eddie. Have you ever had a go at crochet?
LikeLiked by 1 person
I have and I just can’t do it 😦
LikeLiked by 1 person
Yes, there are lots who are either knitters or hookers, not both.
LikeLiked by 1 person
Funny isn’t it as it is similar in many ways? I love the expression ‘hooker’ by the way!
LikeLiked by 1 person
Ha! 😉
LikeLiked by 1 person
Pingback: Yarn on the Hook | Wild Daffodil
I can’t crochet but I can appreciate pretty pictures. These are lovely.
LikeLiked by 1 person
Thank you Oneta.
LikeLike
Gosh it’s so beautiful!
LikeLiked by 1 person
Thank you! 😄
LikeLike
Wow! what a lot of work to create the tutorial. The star centre is prettier than the original.
LikeLiked by 1 person
Photo tutorials take ages don’t they. I’m full of admiration for people like Lucy of Attic 24 who do so many of them. I like the Spiro Start better too.
LikeLiked by 1 person
absolutely AWESOME!!!!!
LikeLiked by 1 person
Wow! Thank you!
LikeLike